Steps View
Steps View is the left-most pane of the designer page. It lists all the steps that are part of this recipe flow. There are various operations that you can perform at a given step. To see the operations you can perform at a given step, hover on the step. You will see three dots(...) next to the step. Click on the (...). You will see the operations as shown below: To understand steps view properly you need to understand what is flow . Please refer to Recipe flow
The three dots you see when you hover over any step. A menu listing the following operations for the step are listed.
- Edit : Edit the step configuration parameters as required by your usecase. Edit options for a given step is dependent on the transformer selected.
- Insert : Insert a new transformer step. There are multiple options provided. Insert between 2 transform steps or Insert after the current step.
- Run : Run the workflow. There are multiple options provided. Run till this step option enables you to run the workflow from start of the workflow to this step in the recipe. Run this step only attempts to run the current step assuming the result from the previous step is available.
- Delete : Delete this recipe step. You are prompted for confirmation. The step is deleted from the reciepe on the user confirmation.
If you delete a step the next step is going to connected to the previous step . So, do remember to run the pipeline so the dataframe changes according to the delete.
Under these options there are sub options under Insert and Run:
Insert :
- Insert after: Insert after is used at a point where you want to add a step after the current step but here the step will not be connected to the next step. It will basically create a different node in the flow .
Suppose I create a step using insert in between by selecting few columns.
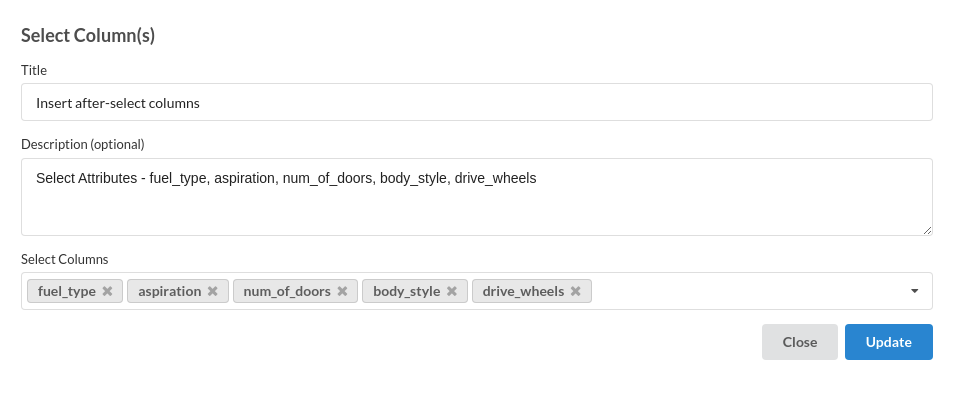
In flow view I will be able to see where was the step added.
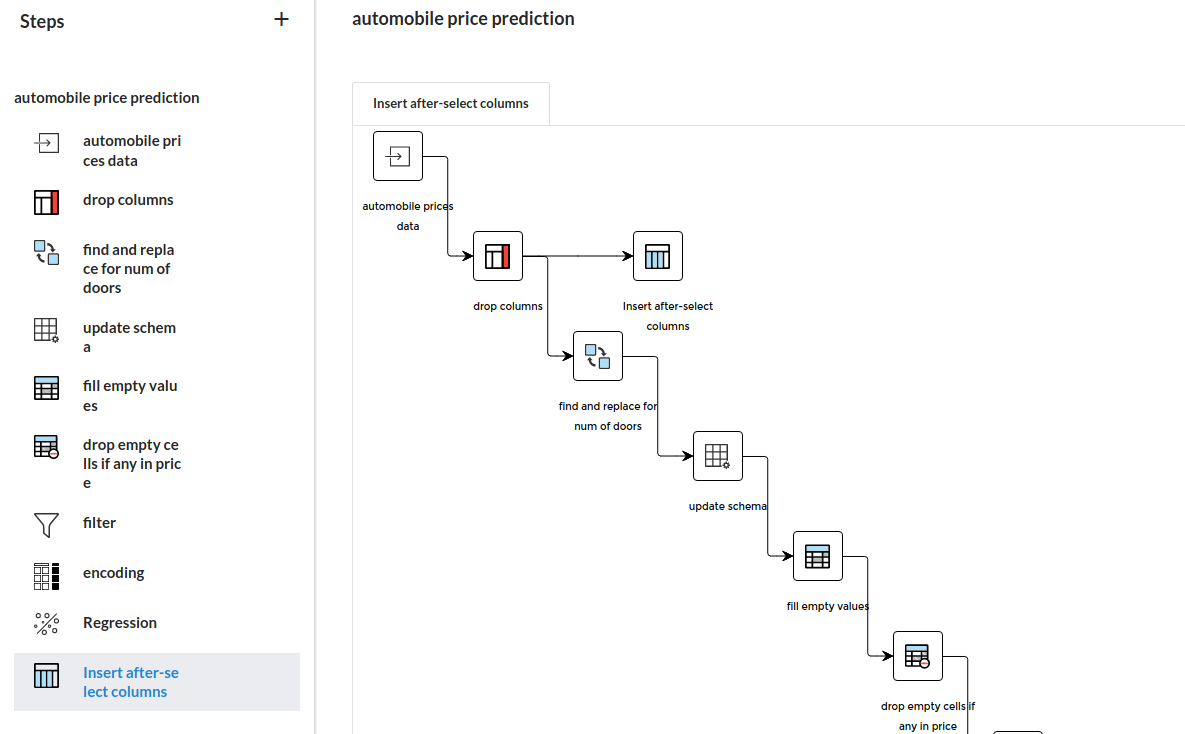
As you can see , In steps view the step is added at the last and in the flow view the step is added next to the previous step and is not connected to the next step.So, potentially insert after can be another way to start another flow from that particular step.
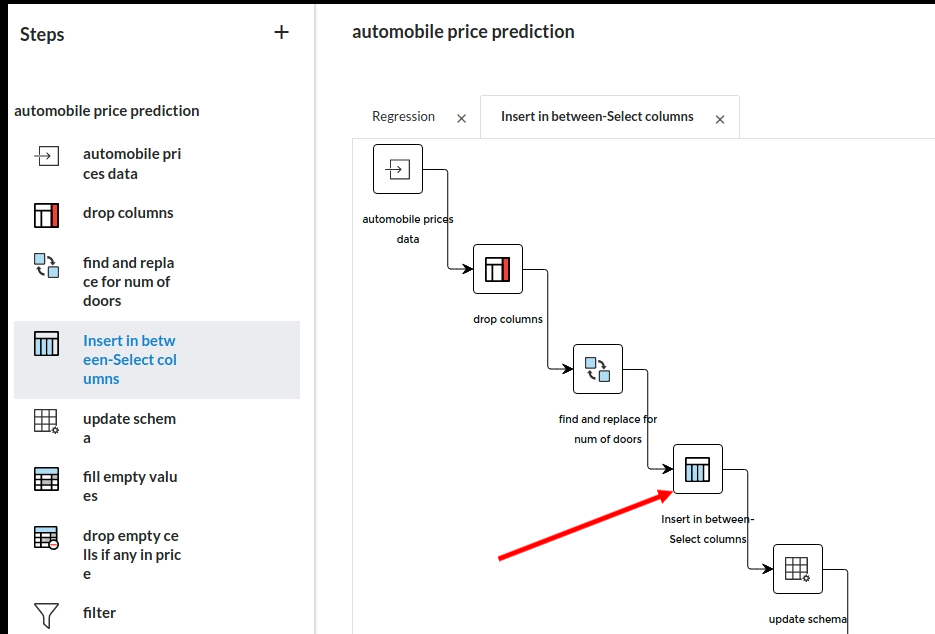
- Insert In between : Insert in between is used when you want to add a step in between two steps . In this, The step createdin the middle will be connected to the next step. So, do remember to run the pipeline after creating the step . In any workflow there are cases where steps are supposed to added in the middle because of any human errors or the requirement demands for it.
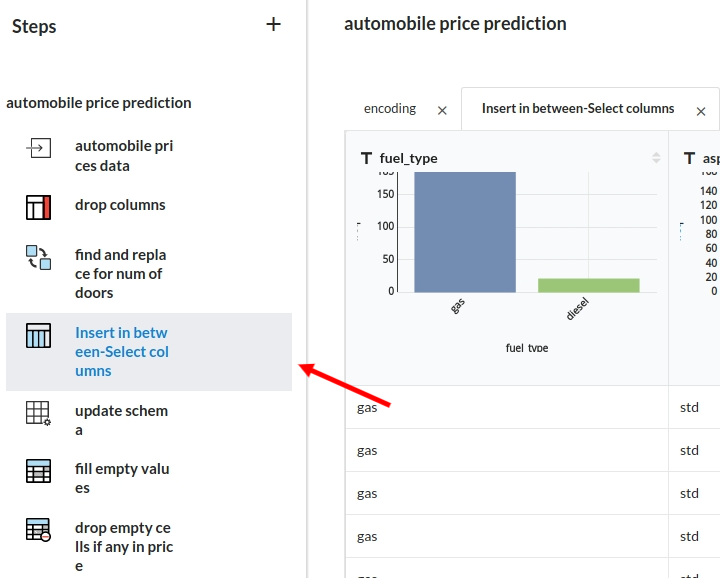
Suppose I create a step using insert in between selecting few columns.
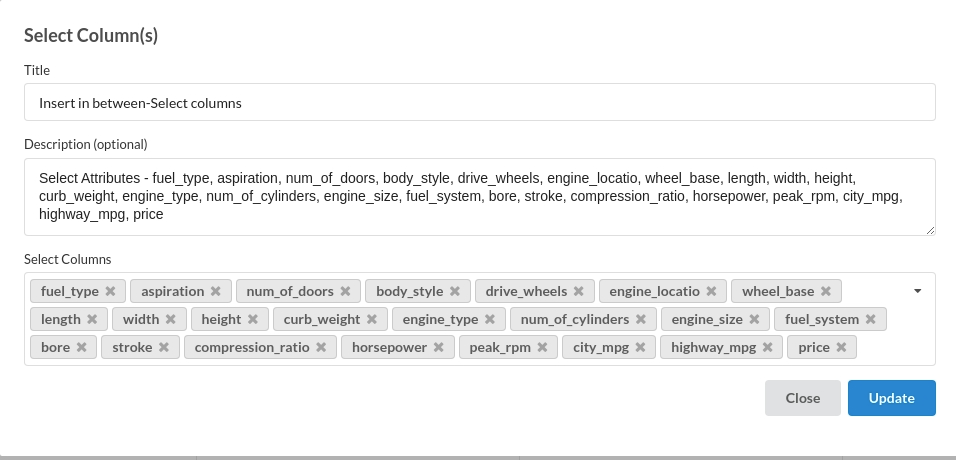
As you can see the steps name is Insert in between-select columns.The step is added in between the step named find and replace for num of door and Update schema
Now, the flow view will have a similar type of scenario. You will see the block being attached to previous and the successor block.
You cannot use insert in between step for Join or Concat processors.
Run :
- Run till this step : If you intend to run the whole workflow to a certain point the Run till this step is useful.
- Run till this step will run all the steps underlying in the previous recipes with all the steps inside them . So, if you have 5 recipes with 10 steps each and have joined all the recipes then it will run all the 50 steps.
- If you have added a step in between then it is necessary to run the whole workflow once.
- Run this step only : To only run a particular step is when you use Run this step only .